NEW CLICK HERE FOR THE AMAZON PRIME PAGES!
NEW CLICK HERE TO SEND US A GIFT! A COOL IDEA TO HELP US FOR HELPING YOU!
CLICK HERE FOR THE MAIN IOWA GOLD START PAGE
NEW IOWA GOLD FORUM WHERE TO GO, BUY SELL AND TRADE, EVENTS IN IOWA
NEW!! GOLD HOW TO PAGES HOW TO BUILD YOUR OWN GEAR!!
NEW BIG GOLD HOW TO PAGES FULL OF PLANS AND TIPS AND TRICKS OF HOW TO FIND GOLD
WHERE TO FIND GOLD IN THE USA A STATE BY STATE GUIDE
TECH SPECS ON GOLD WHAT IT IS ETC.
GOLD EQUIPMENT REVIEW GEAR WE HAVE TESTED AND WHAT WE THINK OF THE PRODUCT
DETECTOR PAGES GOLD AND COINS OR TRASH AND TREASURE TIPS AND TRICKS AND HOW TO PAGES
GOLD EQUIPMENT QUICK FIXES COOL TIPS HERE AND MORE ON HOW TO SET UP GEAR AND MORE TIPS AND TRICKS
IOWAGOLD NATURE AND TRAVEL PAGES!
WET SUIT HEATER
BY MILTY TUCKER
"building a wet suit heater"
As promised.
here are the instructions and pics of how I build wet suit heaters.
I have tried every type of heater i have heard of, I have bent enough copper tubing
to build 100 stills and never was happy with how the heaters worked.
I tried a simple heat exchanger using only a 3/4 pipe nipple in side a outer jacket
with very little luck. i then tried a heat exchanger that had baffles to make the
water stay in the heater longer and that only made warm water unless you slowed
it down to a trickle. one day a friend enlightened me to how his commercial wet
suit heater was built. When he looked threw the muffler side of the heater he could
see fins that went into the path of the exhaust gas and then transferred the heat into
the water . this made good sense with the exhaust gases going threw with out
restriction most of the heat keeps going threw and doesn't warm the water,
but with the fins in the path of the exhaust gasses the fins are heated as the gases
work there way around the fins and with the fins going threw the inner pipe into the
water and transfers the heat into the water .
Wet suit heaters can be dangerous if you get a plug up or if the water going threw
the heater is slowed down for any reason it WILL get hot I have been burned my
self after having a hose get kinked
Use these plans at your risk no warranty expressed or implied your mileage may
vary
In the 1st pic you see my port side motor/pump with one of my earlier wet suit
heaters. This heater did make warm water and i used it as a pre heater feeding one
of my better working heaters
In the 2nd pic you see most of the required parts to build this heater
1 3/4 x 12" pipe nipple
1 3/4 x 4" pipe nipple
2 3/4 90 degree elbows
8" of either 2 1/4 or 2 1/2 muffler pipe
12 5/16 fender washers
missing in the pic are
6" of 1/8 x 3 flat bar or steel plate (to make ends)
4" of 3/8" thin wall tubing (water input and output)
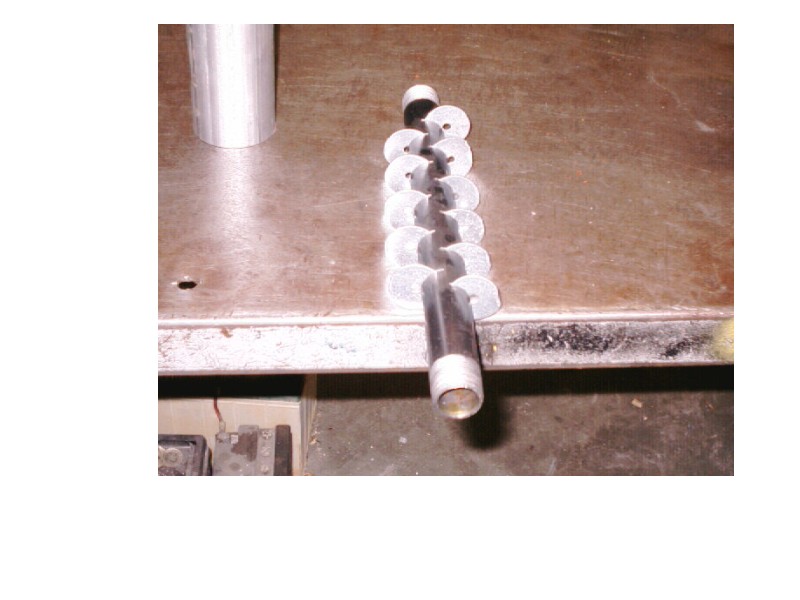
The 3rd pic shows the 3/4 x 12 pipe nipple in a band saw (hacksaw works just fine)
you need to cut slots in the pipe nipple to insert the washers
stay 3" back from either end and leave your self enough room between each washer
so you will have enough room to weld the washers in place
The 4th pic shows the washers driven into the slots
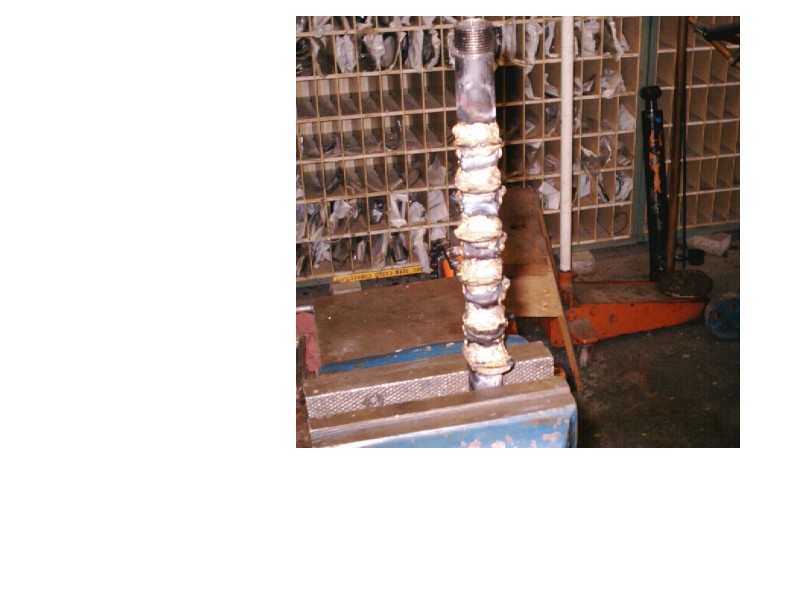
In the 5th pic you can see the washers have been braised in I did first weld them
in but i like to braise them in also to help prevent water leaking into the exhaust side
of the motor (cold water in a hot motor = bad day) after it cools you should leek
test by covering one end and blowing threw the other end you should hear no air
leaking.
The 6th pic shows the heat exchanger (inner pipe and fins) within the outer jacket
depending on how deep you insert the washers into the 3/4 nipple you will probably
need to bend the washers inward before it will fit within the outer jacket.
The 7th pic is just a end shot of the last pic note the washers going threw the 3/4
pipe nipple.
The 8th pic shows the heater with both end caps welded on.
the end caps are made out of 1/8 flat bar i drilled the center hole out to 1" and cut
the end with plenty of overhang 1/2" all the way around this makes it easier to weld
after welding all the way around i take a tourch and cut the excess off and grind it
round I leave 1/8 overhang as to not grind the weld off be sure to also weld the 3/4
pipe nipple to the end cap I then drill 2 1/2" holes in the outer jacket for the
input
and output tubes before you drill look threw the 3/4 pipe to make sure you don't
drill where the washers are. !!only drill threw the outer jacket!! insert the 3/8 tube
about 1/4" into the outer jacket and either weld or braze in. at this you can leek
test
the outer jacket simply put a finger over one tube and blow into the other tube you
should not hear air leaking
The 9th pic shows the heater mounted on the motor
the 10th pic shows the heater with a brace welded on and bolted to the head of the
motor this will help prevent damage when you use the heater to carry the motor
The 11th pic shows the heater with paint on it and with the input hose hooked up to
the heater I use this valve to control the flow of water threw the heater the out put
of the heater goes to a 1 gallon tank and i use the other side of the valve to provide
cold water to a mixing valve
Milton Tucker


THANKS MILTY!!


![[Most Recent Quotes from www.kitco.com]](http://kitconet.com/images/quotes_7a.gif)